Physical Address
304 North Cardinal St.
Dorchester Center, MA 02124
Physical Address
304 North Cardinal St.
Dorchester Center, MA 02124

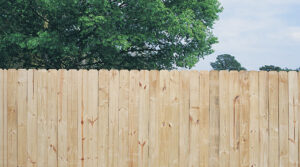
Fencing was the first trade I learned when my dad put me behind a nail gun at the ripe age of 13 years old.
That being said I am going to show you how I personally build a pine privacy fence commonly found in suburban America. This guide is recommended for people who are comfortable with power tools. It is designed so that a handyman who has never built a fence before can follow step by step with repeatable success.
This guide can be followed for other styles of wood fences with required alterations to the instructions found below.
If you’re using a powered auger, I would also have another person there. Augers have a remarkable ability to turn a relatively boring Saturday project into an exciting demonstration of rotational physics.
Call 811 before you put a shovel, auger, or post-hole digger into the ground. The national 811 service exists specifically to have buried utilities marked before excavation, and the required advance notice varies by state. (811 Dig)
And remember that a utility locate is not the same thing as determining your property line. You need both questions answered.
811 will come out and mark all of the underground utilities under your property. If you then strike a utility line you will rightfully be able to claim that you performed you due diligence and hopefully will not be liable.
Important: 811 requirements exist for both homeowners and contractors, your city will not be very sympathetic when you rupture a main water line.
A fence is one of those projects where being off by three inches at the beginning can turn into being off by several feet by the time you reach the other end.
Before digging anything, establish:
If you’re not certain where the property line is, don’t guess. A fence is a terrible place to discover that your understanding of your property boundary was slightly optimistic.
Also check local zoning, setback, height, HOA, and permit requirements before construction. Fence requirements vary by jurisdiction.
Pro tip: Talk to the neighbor before tearing down the fence. make them aware of the construction that is going to take place and how long it will take. I would also recommend having the property line conversation with your neighbor before construction begins. This is common curtesy but is often overlooked and it’s not uncommon for fence disputes leading to demolition of a brand new fence. Plus, it is not uncommon for good neighbors to split the cost of a fence on a shared property line.
Correctly purchasing materials can be the biggest cost factor when it comes to construction projects.
The first step of good purchasing is measuring. Your fence will be made up of several straight runs. I prefer to calculate each run individually then total all of the materials needed for the project. For this part I am going to explain how to calculate materials for a single run of fence.
Measure corner to corner of the run then divide the total length in feet by 6, round up to the nearest whole number then add 1.
Ex. 32ft run: 32 / 6 = 5.3 | 5.3 > 6 | 6 + 1 = 7 posts
This is assuming 6 foot spacing. Some areas allow 8 foot spacing which would be cheaper in the end, but you would have to check your local codes. When in doubt, or high wind areas, use 6 foot spacings.
In the example you will have 5 sections that are 6 foot across and one that is roughly 2 feet across. This is ok. put the smaller section next to the corner. You can also extend one section to 8 feet if you would like. Unfortunately property lines determine the fence shape and not the other way around.
If your area allows 8 foot spans this would be preferred for this specific fence since it would lead to 4 evenly sized sections.
6 and 8 foot spans are not a rule. If your fence is 35 feet long feel free to make your spans 7 feet long just know that you will have to cut every rail because they do not make 7 foot dimensional lumber.
I use 8 foot Galvanized 2 inch round fence posts. They are commonly sold for chain-link fence and stay in place against impressive forces. If you use Galvanized round fence posts they will likely out live you. It is the best choice for the strongest fence.
important: Your Posts must be at least 8 feet long for a six foot tall fence because you will be burying the posts 2 feet into the ground.
For concrete I use two 50lb bags of quick-rete for each post.
You can also use one 80lb bag for each post, but i wouldn’t recommend using less than this.
I always use 100lbs of concrete on corner posts.
A Rail is just a horizontal 2×4 connecting the posts.
Each section will have a top, middle, and bottom rail. The length of your rail must be at least the span between each post.
I always buy pressure treated lumber for fence projects because they are so susceptible to rot.
I prefer to use the longest rails possible up to 24 feet long. A longer rail will span across multiple sections and will stay straighter over years because it is supported in the middle. If you use 6 foot rails then they are only supported at the ends and the weight of the pickets can cause the rails to sag in the middle making your fence look like a wave.
24 foot rails can be very difficult to move without a trailer so it is completely understandable if you cannot safely undertake that task. Most hardware stores with a lumber yard now deliver and can make bigger projects possible without renting a truck and trailer.
If I am personally picking up the supplies then I use rails that are twice as long as the post gaps so they are at least somewhat supported in the middle.
Caution: If your rails are spanning multiple sections you need to be sure that your posts are positioned evenly. A 12 foot rail is only 12 feet long and will not span two 6.25 foot sections.
When purchasing pickets its important to know if you want 6 inch or 8 inch pickets. The most common is 6 inch and is what I will be describing.
I always buy pressure treated lumber for fence projects because they are so susceptible to rot.
Important: A six inch picket is on 5.5inches long. It is construction lumber, it all works this way, I don’t make the rules.
Take the length of your run in inches and divide it by 5.5. this will give you the total number of pickets required for the fence.
Do not buy the minimum number of pickets required. Even if you hand pick the wood you will still end up with pieces that are warped, damaged, or are generally unusable.
Add 10% to the quantity of pickets required. This will save you from running short in the middle of the job. The extras can also be returned to major hardware stores at no extra cost. As the fence gets bigger the ratio gets smaller.
For a full backyard fence I usually only get an extra 5% of pickets while if I am only replacing a single section I get an extra 10%.
Each rail end will require four lag bolts for each section it spans. If a rail spans two sections it will require 8 lag bots.
I use 1 ” – 1 1/2″ galvanized lag bolts.
Important: Not all post clamps are the same, make sure that your lag bolts will fit through the bolt holes in your post clamp.
Each post will require three post clamps to attach the rails.
Look-up Pipe Grip Tie for 2 in. pipe to find the clamps I prefer.
The legs on these clamps can be bent to work for internal and external corners.
Your will need six nails for each picket. Two at each rail connection.
Buy Galvanized nails for a pine fence.
Don’t forget a post cap for each post, otherwise they will fill with rain water and bugs.
Your local codes will likely answer this question for you.
6 foot and 8 foot spans are the standard. I prefer 6 foot spans because of the high wind where I live however If a fence’s total length is 32 feet it can work out rather nicely to use 8 foot spans. If the total length is 36 feet then the opposite applies.
If your fences length is not a multiple of either 6 or 8 then you will have one section that will be shorter. This is ok. Property lines determine fence shape and it cannot always work out perfectly.
I live in a southern state so I sink all of my posts 24 inches.
In some northern states the frost line may be lower and the codes will determine this for you.
Be sure that you bury each post the same depth. keep digging or back fill the hole so that it is 24 inches deep. If your holes are different depths then each post top will be at a different height and will not be visually pleasing.
An uneven ground can make it difficult to find the true depth of your posts relative to each other so I run a string line once inch above the highest point across the ground where the holes are dug. I then measure to make sure that each hole is the same depth in reference to the string. This will give you even tops across your entire fence.
The string has the added benefit of contouring to the landscape so that your fence has a even slope across the entire length.
Start with the corners.
Drive stakes where the fence changes direction and at the approximate locations of gates.
Then run a string line between the stakes to establish the fence line.
Don’t use your eye to determine whether a fence is straight. Your eye is surprisingly forgiving when you’re standing ten feet away from something. A string line is not.
Measure from your established property line and make sure the fence is positioned where you actually intend to build it.
Once the corners and ends are established, divide the fence into 6 to 8 foot runs where the rest of your posts will lay.
Measure Carefully. This will determine if your rails will connect to the posts or not. If you buy 6 foot rails they will not span a gap that is 6.1 feet long. too short is better than too long, but spot on is best.
If you plan to have a gate in your fence you will need to add an extra post on the latching side. Both the latching side and the hinge side of the gate require a post.
You can either position your gate in the middle of a run by adding an extra post at the width of your post or you can leave a gap between two run to add a post later. A gate is a good way to take up extra space when the total length of your fence is not a multiple of 6 or 8.
Depth is more important than Width. A typical post hole digger will have a width between 6-10 inches. Either will do as we are using 2 in posts.
You can either dig the holes with a post hole digger or a motorized auger.
If you are using the auger do not immediately start with your final diameter bit. Dig your hole in two stages with a smaller “pilot” hole followed by your final diameter.
Augers can be especially dangerous. If it hits a rock the blade will stop spinning and the handles will be ripped out of your hands potentially hitting you and breaking an arm. A pilot hole allows you to start with less risk of injury.
Either way take it slow and be safe.
If you hit something other than dirt, stop and investigate before continuing.
I like to establish the corner posts before setting the line posts.
These are your reference points for the rest of the fence.
Put the post in the hole and check:
I use a wheelbarrow to mix the concrete. I am looking for a thick batter consistency.
One person should hold the post while the other pours. With concrete in the hole use a poking stick or wiggle the post to make sure it finds its way home.
The corner posts are the most forgiving because everything else is measured from them. Make sure that your total distance between the posts and the plumbness (how vertically straight it is) does not change while the concrete is still soft.
Once your corner posts are set and the concrete is dry, run two string lines, one at the top and one at the bottom.
The string lines should go around both sides of the post to give you a gap that the rest of your posts will fit in.
When pouring your concrete for each post make sure that the post is touching all four strings, this is how you can guarantee that the fence will be straight.
Measure the distance between each post before the concrete dries to make sure they are the right distance from each other. Remember that your measured from center originally. Now you are measuring from the outer diameter of the post.
Measure from the nearside of one post to the other then add 2 inches if your are using 2 inch posts. This will give you your distance on center.
It goes without saying, but when your concrete is dry you are stuck cleaning up any mistakes you may have made up to this point. Correctly set posts make the rest of the job a breeze.
For a six-foot privacy fence, I use three horizontal rails.
Your top and bottom rails should be no more than 12 inches from the top and the bottom of the pickets. I prefer 6 inches from the top of the rail to the top of the picket.
When your fence sits in the sun a weather it will warp and if the ends of the pickets are too far from the rail they will begin to curl in or out under the weather.
The middle rail can just be in the middle.
Slide the post clamps over the posts and get a rough idea of where they should be before snugging them up on the post.
Have you and a friend lift the rails from either end and position them so that they end in the middle of posts. If one end does not end directly in the middle of a post, cut it so it does.
Use one lag bolt on each side to set the rail. Attach the post clamps with one lag bolt everywhere the rail crosses a post. If your rails are the same length as your span then that will only be at the ends.
with your rail loosely attached, use your level to make any adjustments your need to make the rail level. If the fence is on a gradient you can use another string line to make sure that the rails are even on the posts.
Butt the end of your next rail against he end of the previous one so that they meet in the middle of the post. and repeat the process.
Take a step back and look at the whole fence to see if the rails are cohesive and evenly spaced from each other.
If you are happy with their vertical spacing and gradient go ahead and snug up the post clamps then run in the rest of the lag bolts to hold it into place.
Start at one end of the run and nail a picket with one nail in the top and one in the bottom. Ensure the picket is plumb. I start with only two nails so that the picket can be easily removed if there is a problem.
go to the next post and hammer in another picket so that the top is the same distance from the top rail as the first picket you installed.
These will be your guides. Hammer a nail most of the way straight down into the top of both pickets. Run a stringline as tight as you can between the two nails. This will mark where the top of each picket should be.
You can now start installing pickets. Hold the picket up to the fence so that the top of it barely touches the stringline and the side of it is pressed firmly against the previous picket and put one nail in the top rail. Now grab the picket from the side and pull it into the previous picket before nailing the middle rail. now use your boot to push the bottom of the picket into the previous and nail the bottom rail Then check if its vertically level.
This system will keep the pickets tightly together for extra privacy and will ensure that your pickets stay plumb as you go. If a picket is not plumb fix it by making an adjustment with the next picket by leaving a tiny gap in either the top of the bottom between the two pickets. If the fence is severely off plumb do not try to fix it with one picket, feather in the adjustments over several.
once you are halfway through your run you should move your stringline. Remove the lone picket that is holding the far end of the stringline and move it down to the middle of the next span and reattach the string line as before.
This system of never letting yourself reach the stringline will make the fence look more cohesive and smooth as you look across the top of the finished product.
This is important.
Don’t bury the bottoms of your pickets in the dirt.
Wood absorbs moisture. Keeping the bottom edge above the soil gives it a much better chance of drying between wet periods. and prevents bugs and rot from attacking your fence.
I leave enough of a gap so that i can slide my fingers under the fence. If the ground is uneven and you find yourself having to bury the bottoms of the pickets into the ground to make the tops even then go ahead and cut the bottoms off.
You can easily measure where to cut by flipping the picket upside down holding it against the fence so that there is a gap between it and the dirt. Mark where the string line crosses and cut there.
Repeat the above steps until you have placed pickets across the entire run of fence.
Do not forget that you have only put one nail in the top, middle, and bottom of each picket thus far.
Take a step back and make sure there are not any pickets that are out of place being either too high or too low. If there are take the time now to replace them.
Once you are content with the aesthetics of the fence, put a second nail in each rail in each post so that there are two nails in the top, middle, and bottom of every picket.
Put the post caps on each post and tap it down.
A six-foot fence is within the ability of many homeowners, but there are situations where I would bring in someone with the equipment or experience to handle it.
Consider hiring a professional if:
A surveyor may be appropriate when the property boundary is uncertain. A structural engineer may be appropriate when the fence or gate falls outside the assumptions of the manufacturer’s standard system.
There is no prize for doing every part of a project yourself.
Don’t start digging because you’re excited to start digging. The first hour of fence construction should involve measuring, staking, checking measurements, and then checking them again. Digging is the easy part to start. Fixing a bad layout after the concrete cures is not.
Set the corners and gates before worrying about the pretty middle sections. Once you know where the important posts are going, the line posts become much easier to lay out.
Use the actual dimensions of your pickets. The number printed on the lumber tag is not necessarily the dimension you’ll be measuring with your tape. A small difference multiplied across 100 pickets becomes a large difference.
Don’t try to make every fence section exactly the same length. A slightly shorter section near a corner or gate is much better than ending up with a ridiculous little sliver of fence at the end.
Not all pickets are made the same. Some pickets are simply unusable and picking out your own can save you a lot of wasted money. Unfortunately you lose this option when you are having lumber delivered.
Don’t install the pickets before you’re happy with the rails. If the rails aren’t straight, the pickets won’t magically fix them. They’ll just give you more things to look at while you wonder why the fence looks crooked.
Keep the bottom of the pine away from the ground. This is one of the easiest ways to give the wood a better chance of drying out. Don’t let mulch, dirt, and grass slowly turn your fence into a compost project.