Physical Address
304 North Cardinal St.
Dorchester Center, MA 02124
Physical Address
304 North Cardinal St.
Dorchester Center, MA 02124

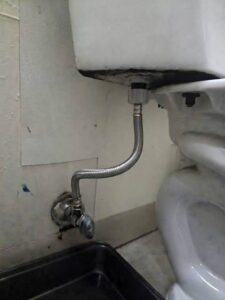
If your old toilet supply hose is cracked, kinked, or just in need of a replacement then don’t worry, replacing a toilet supply line isn’t much different than just installing a water hose.
If you actually mean to replace the valve on your toilet supply line then that is a little more in depth of a problem which I cover below.
→ [How to Replace Toilet Fill Valve]
There are many different types of toilet supply hoses, but they all achieve the same goal of bringing water to your toilet. There are only two parts of the hose that I care about when choosing a replacement, Length and Fitting Sizes.
The easiest way to ensure you get a hose with the right fittings and length is to bring the old hose to the hardware store with you and hold it up to the new hose.
If this isn’t possible then the common toilet fitting sizes are 3/8th inch on the valve side and 7/8th inch on the toilet side. As for length, too long is always better than too short.
Choosing the right material. It doesn’t matter. Seriously, every toilet hose on the shelves at the hardware store will do the same job whether its braided steel or plastic tube. My genuine advice is choose the one you think looks best.
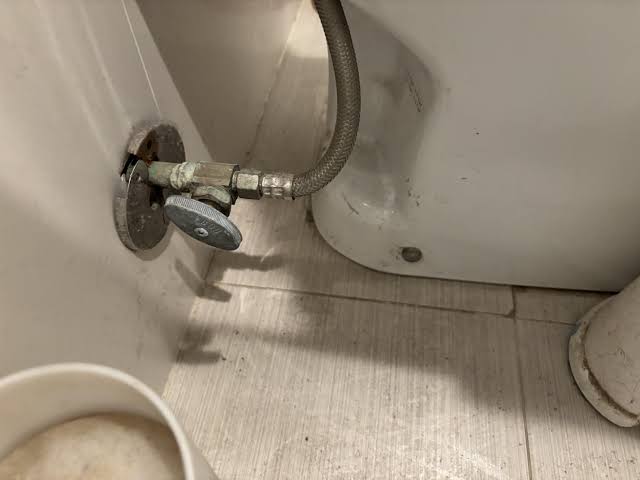
Find the small shutoff valve coming out of the wall or floor behind the toilet.
Turn it clockwise until it stops. Be gentle while doing this, replacing a toilet shutoff valve is much more complicated than replacing the hose. If the valve truly is stuck then don’t worry you can follow my guide below.
→ [How to Replace Toilet Fill Valve]
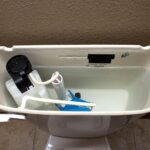
With the valve closed, flush the valve and hole the handle down to drain as much water out of the toilet as you possibly can. any water left in the tank will end up on the floor when you remove the supply line so I usually sponge out the remaining water.
Put a towel or small bucket underneath the connection for when water inevitably comes out.
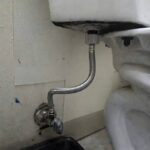
There are two connections on the supply line.
One connects to the shutoff valve and the other connects to the bottom of the toilet tank.
Most of these hoses are designed to only be hand tight like a water hose. Try to loosen the hose with your hand first. If you cannot get it disconnected then you can gently use channel locks or a pipe wrench to break it loose.
Do not put tools on plastic fittings. If the fittings are plastic then they are designed to be hand tight. This applies more for installing the new hose, if you need to use the tools to remove the old one then so be it.
Once both ends are disconnected, remove the old line and take it to the hardware store to get a new one.
There should be rubber washers inside the ends of the hose fittings on both sides. This rubber is what actually seals the hose and without it, it will always leak.
Connect one end of the new supply line to the shutoff valve and the other end to the toilet tank.
Start both connections by hand and do not tighten either down until both are connected. Once the hose is in place and you see that it fits go ahead and tighten the connections by hand.
Once they are hand-tight, give each one another small turn with the wrench. Do not put tools on plastic connections. If the connections are plastic then they are designed to be tightened by hand.
You don’t need to crank down on them. These fittings seal with their built-in washers or seals. Tightening them excessively can actually damage the connection.
Slowly turn the shutoff valve counterclockwise.
Watch both connections while the tank fills.
If you see any drips or leaks then gently tighten the connection until the leak stops. If you have to put any serious force into the fitting then you likely have done something wrong. Most likely you forgot the rubber washers. If this is the case take the hose back off and try again.
It is much easier to remove the hose than it is to replace the supply valve because you damaged it from over tightening.
Once the tank is full, flush the toilet and watch the connections again. I like to check them a second time because sometimes a leak doesn’t show up until the toilet has been refilled.
The biggest thing I would tell a first-time DIYer is don’t be afraid of a little water. This is not the kind of plumbing job where you are going to suddenly have water shooting across the bathroom if something goes wrong. The shutoff valve lets you stop the water, and a towel takes care of the small amount that remains in the line.
Also, don’t use Teflon tape unless the manufacturer specifically calls for it. Most toilet supply lines use sealing washers. The washer does the sealing, not the threads.
If the shutoff valve won’t turn, don’t force it. That’s a different problem and a good reason to stop before you create a bigger one.
My preferred method is simple: shut the water off, remove the old line, hand-tighten the new connections, snug them with a wrench, then slowly turn the water back on and check for leaks. There isn’t much more to it.