Physical Address
304 North Cardinal St.
Dorchester Center, MA 02124
Physical Address
304 North Cardinal St.
Dorchester Center, MA 02124

Test
Replacing a toilet handle is one of the easiest plumbing repairs you can do yourself. If the handle is broken, loose, stuck, or just looks like it belongs in a bathroom from 1987, you can usually replace it in a few minutes.
You don’t need to shut off the water for this job. You’re only working on the handle and flush mechanism inside the tank.
Before buying a replacement, look at where your handle is mounted on the tank. Toilet handles can be front-mounted, side-mounted, or angle-mounted, and some handles are made to work only in certain positions. Some handles are also designed for the left side, right side, or both.
A universal handle is usually the easiest choice. Just make sure it actually fits the mounting position on your toilet.
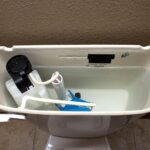
I also recommend taking a picture of the old handle and lever arm inside the tank. That gives you something to compare against when you’re standing in the plumbing aisle.
Lift the lid off the tank and set it somewhere safe.
In the sink, bathtub, on the ground, it doesn’t matter to me.
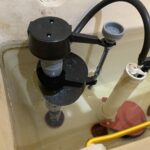
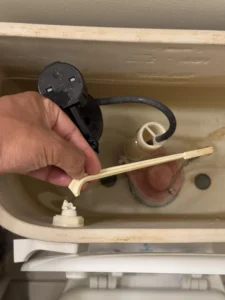
Look inside the tank and find the lever arm attached to the handle.
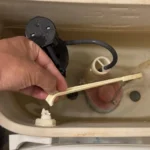
The lever arm is connected to the flapper by a small chain. Unhook the chain from the lever and take note of which hole the chain was connected to. You will want to reconnect the chain how it originally was.
You can take a picture here too. There is no reason to rely on your memory when the toilet is sitting right in front of you.
The handle is held in place by a nut (usually plastic) on the inside of the tank.
Here’s the part that catches people: the nut is usually reverse-threaded.
On most toilets, turn the nut clockwise to loosen it and counterclockwise to tighten it. It is designed this way so that it doesn’t back off and fall into the water.
If it’s stuck you can use a little pressure with a wrench to try and free it, but double check you are turning it the right direction first. Also if you read my article you know I am strongly against putting tools on plastic fittings, but its your life.
Once the nut is off, pull the old handle and lever arm out through the hole in the tank.
Most of the time there is no reason to disconnect the lever arm from the handle, but if it makes the job easier feel free to do so.
Remove the nut and washer from the new handle.
Slide the new lever arm through the hole in the tank from the outside. From inside the tank, install the washer and mounting nut.
Hand-tighten the nut. you can snug it up a little with a wrench if you really want to, but because it is a left handed thread it will tighten itself over time.
Don’t overtighten it. The handle only needs to be secure. Cranking down on the nut doesn’t make the toilet work better; it just gives you a chance to strip the plastic threads.
Some toilet handles can be adjusted from the lever arm, but all toilets can be adjusted using the chain.
Reconnect the chain to the lever arm, preferably using the same hole as the old handle.
With the handle sitting normally, the chain should have about 1/2 inch of slack. You want enough slack for the flapper to close completely, but not so much that the handle moves halfway before it starts lifting the flapper.
Flush the toilet and watch the chain and flapper.
Some replacement handles bendable lever arms. If yours needs to be bent to match the old one, bend it slowly. I honestly prefer not to bend the lever arm even if it is designed for it and instead make my adjustments using the chain.
Flush the toilet a few times and watch what happens inside the tank.
The handle should move easily, the lever should lift the flapper completely, and the flapper should drop back down and seal when you release the handle.
If the toilet keeps running, check the chain before assuming something else is wrong. A chain that is too tight can keep the flapper from sealing.
Once everything is working correctly, put the tank lid back on.
Don’t overthink this repair. A toilet handle is just a lever that lifts the flapper. There isn’t much to it.
I like to take a picture of the old setup before removing anything, install the new handle in the same position, reconnect the chain in the same hole, and then make small adjustments until the toilet flushes correctly.
The biggest mistake I see is overtightening the handle nut then complaining that the lever is stiff.
And if the new handle doesn’t quite work right, don’t immediately assume you bought the wrong handle. Check the chain adjustment first. Sometimes moving the chain to a different hole is all it takes to get everything working properly.
This is a good beginner plumbing repair. Take your time, don’t force anything against the porcelain, and test the toilet before you put the lid back on.