Physical Address
304 North Cardinal St.
Dorchester Center, MA 02124
Physical Address
304 North Cardinal St.
Dorchester Center, MA 02124

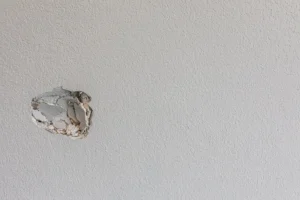
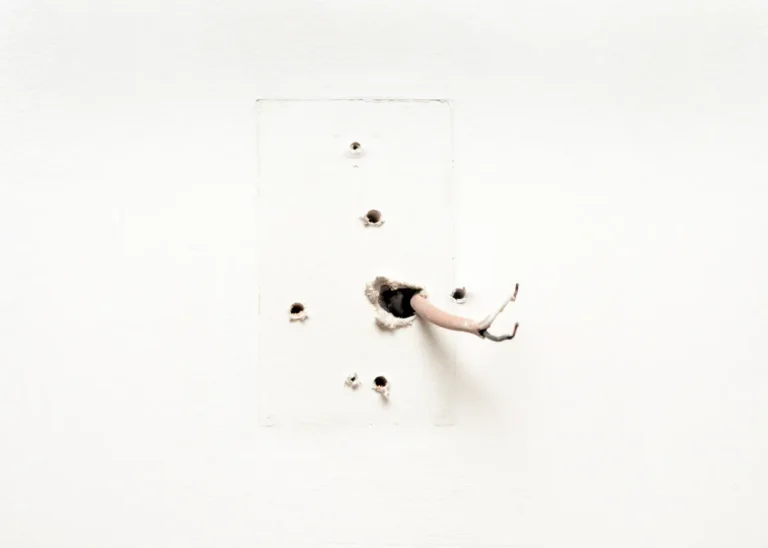
A medium-large sized hole in drywall is a little more involved than filling a nail hole, but it is still a repair that most homeowners can handle with the right materials and a little patience.
When I say “medium-large,” I’m generally talking about a hole roughly 2 to 12 inches across. These are common after removing wall-mounted items, moving electrical boxes, opening up a wall for repairs, or simply having kids.
There are several ways to repair a hole this size. I’ll show you the proper method because It produces the strongest, most seamless, and longest lasting repair. If you don’t have or don’t want the tools listed you can check out my “budget drywall repairs” for tool free and budget friendly approaches to the same problem.
For the method I use, I typically gather:
I also keep a shop vacuum nearby. Drywall dust gets everywhere, and cleaning it up as I go makes the job considerably easier, and keeps my wife considerably happier.
If you have never worked with drywall before, buying drywall can quickly get confusing. Its a common experience to drive to the hardware store to buy drywall only to realize you don’t know what thickness is on your walls.
Measuring the thickness of damaged drywall from a jagged edge can also prove to be ambiguous.
On a standard interior wall I always assume 1/2″ thick drywall. This is the standard and the most common for this application.
If your wall is an anomaly I apologize in advance.
Unless you managed to punch a perfectly square hole into your wall, you will need to straighten those edges.
Before ever cutting into a wall of any kind, be certain that you know what is behind that wall. A drywall saw into an electric cable is an easy recipe for a bad day. Luckily you should have a hand dandy hole which you can look through to be sure you are not cutting anything important.
If there is something behind the wall that shouldn’t be cut, use a box cutter or utility knife to carefully cut the drywall without going all the way through then remove what you need in pieces.
I use a straightedge to mark my cut lines and then carefully cut along them with a utility knife or drywall saw. Since you will be cutting anyway I would recommend cutting the hole to the nearest inch. A square 4”x 4” patch is much easier to cut than a 3 5⁄16” x 5 ⅞” patch. Keep it as easy as possible.
Pro tip: You can cut the patch first then trace it onto the wall for quick and easy fitting.
A wood backing needs to be added behind the hole so you have something to attach the new drywall patch to.
I use spare plywood, but really any scrap piece of wood down to 1/4” can work for this. The scrap of wood needs to be longer than the hole is wide so that it can be fastened to the existing drywall. Allow for an inch of overlap on either side of the existing drywall and try to attach the fastener at least ¼” from the edge or it may tear itself out
Two backing boards are always preferred to prevent the patch from flexing because it only has one point of support. If two boards cannot fit in the hole you can get away with one wide one.
Run in your drywall screws to hold the backing board so that they sit just below the surface of the board without breaking the paper.
Alternative: You can use drywall repair clips or specialized patch supports instead of wood. These products can make the job faster, especially if you don’t have suitable scrap wood available. I still tend to use wood because it’s inexpensive, readily available, and gives me a solid attachment point.
Cut a drywall patch from any spare or new drywall you may have. You can use a drywall saw, a circular saw, or most commonly a simple utility knife. If you have never cut drywall before I would recommend just using a drywall saw as it’s the most fool proof.
If you do insist on using a utility knife then simply score the drywall along your measurements then snap the board before cutting the paper on the opposite side. Repeat this process for your second cut.
I will issue a warning to DIY’ers getting a clean edge with a utility knife is not as easy as it looks. When in doubt use a drywall saw, it is cheaper than a new sheet.
Try to get your patch as close to the size of your hole as possible, this will minimize any headache around mud shrinkage in the later steps. Small gaps are ok, but larger gaps may impact the quality of your day moving forward.
Center the patch on the backing board so that the gap along the edges is even all the way around then secure the patch using the drywall screws.
The same as before, you want the screw heads just below the surface of the board but don’t drive them so deeply that they break through the paper. Once the paper is broken, the screw loses some of its holding strength.
At this point, I press gently on the patch to make sure it doesn’t move. If it flexes, I add additional backing or screws before moving on.
On a fresh install or new build I would use paper tape, however for any beginners or DIY’er I would recommend using a fiberglass joint tape with an adhesive. This will simplify the whole process and eliminate much of the technique required. Because this guide is tailored to beginners I will be only talking about how to use the mesh tape, however I cover paper tape in my “drywall installation guide”.
Apply one continuous strip of tape across each of the edges of your drywall. Avoid layering two pieces over each other because this will create a raised bump in the end.
Using a 6 inch drywall knife, apply your first thin layer of joint compound/ Drywall mud (they are the same thing) ensuring that you completely cover the tape.Your goal is to cover the tape with as little mud as possible.
I don’t try to make the repair disappear with the first coat. At this stage, I’m primarily concerned with covering the tape and establishing a smooth base, then I let the compound dry completely before continuing.
Once the first coat is dry, apply a second coat using a wider drywall knife.
This time, I want you to spread the mud an inch or two past the edge of your last coat. With the longer knife you can push one edge of the blade against the wall flexing it slightly as you drag it across. This is called feathering, and it’s one of the most important parts of getting a professional-looking repair.
I gradually reduce the thickness of the compound as I move away from the patch. The objective is to create a gentle transition between the repaired area and the existing wall, again using as little compound as possible.
If you feel you need to, a third coat can be applied, but remember, more mud = more sanding = more mess.
Use as little compound as possible to complete the job, any thick globs of compound stuffed in large cracks or spread across large surfaces will shrink as it dries and crack.
Once the final coat is completely dry, use your sanding sponge to remove any bumps, burrs, or waves. Low spots cannot be fixed by sanding, take it from me you will only end up sanding away too much and potentially exposing the tape. If there are any low spots add a touch of compound once you are finished sanding.
When you think you are done sanding, run your hand across your work to feel for any imperfections your eyes might miss.
If a repair is large enough to require a patch of new drywall, then it is large enough to require primer. Prime your patch before painting. Fresh joint compound absorbs paint differently from the existing wall, so skipping primer can leave a visible patch even when the repair is perfectly smooth.
Only after the primer is dry do you paint. Primer also has the added benefit of saving you from having to paint extra layers of expensive topcoat to make up for not priming.
If the wall is relatively new and I have the original paint, a touch-up may be enough.
If the paint is older or has faded, I prefer to paint the entire wall from corner to corner. This usually produces a much better color match than trying to blend new paint into an older finish, but you can really play it by ear.
At this point you should have a fresh drywall patch to be proud of. If you have a textured wall then your patch probably stands out pretty significantly. Luckily, you can follow my, How to texture, a wall guide for a final and seamless repair.
The biggest thing I would emphasize is don’t rush the finishing work.
The size of the patch does not greatly impact the difficulty of the repair. I often cut the hole to at least 4″x4″ because it is easier than trying to fit the backing into a 2 inch hole. A larger patch can also make it easier to blend the mud into the existing wall simply because you have more room to work with.
I also recommend keeping the joint compound layers thin, using progressively wider knives, and letting every coat dry completely before sanding or recoating.
One of the easiest mistakes to make is trying to get the repair perfectly smooth by applying more and more compound. At some point you need to stop touching it and let it dry. You will not get the mud perfect, nobody does. Wait, let it dry, sand it, then make your final touch-ups.
I also don’t try to make the patch perfectly flush with the existing drywall right away. The finished repair needs to transition gradually into the surrounding wall. That’s why I use wider knives and extend each successive coat farther out from the patch.
Another thing I pay attention to is the texture of the existing wall. A perfectly smooth repair can still stand out if the surrounding wall has an orange-peel, knockdown, or other texture. In those situations, matching the texture is just as important as getting the underlying patch smooth.
There are several perfectly good ways to repair a medium-sized hole. Mesh patches and repair kits can save time, but traditional drywall patches with wood backing will always work while alternative methods can be hit or miss.
My preferred method is to square up the opening, add wood backing, install a matching piece of drywall, tape the seams, and build up several thin layers of joint compound.
It takes a little more work than simply covering the hole with a patch, but I prefer the finished result. When the repair is properly feathered, textured when necessary, primed, and painted, the original hole should be virtually impossible to find.
Most importantly, don’t be afraid to slow down. Drywall repair is one of those jobs where spending an extra 15 minutes on preparation and finishing can save you an hour of trying to correct a bad patch later.