Physical Address
304 North Cardinal St.
Dorchester Center, MA 02124
Physical Address
304 North Cardinal St.
Dorchester Center, MA 02124

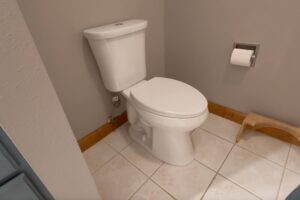
Replacing a toilet is one of those plumbing jobs that looks worse than it is. The actual installation is pretty simple. The problems usually come from rushing the parts you can’t see, especially the toilet flange, the seal, and the floor underneath it.
If you’re replacing a standard floor-mounted toilet, the basic process is: measure first, remove the old one, inspect the flange, install a new seal, set the toilet, connect the water, and test everything for leaks.
For a standard toilet replacement, I usually have:
I also recommend having another person around to help lift the toilet. Toilets are heavy, awkward, and not particularly cooperative. There isn’t much benefit to proving you can carry one by yourself.
The first thing you need to check is the rough-in.
The rough-in is the distance from the finished wall behind the toilet to the center of the toilet flange. A 12-inch rough-in is common, but 10- and 14-inch toilets are not uncommon.
Measure from the finished wall, not the baseboard, to the back of the base of the toilet. Then check the dimensions of the new toilet to make sure the tank and bowl will actually fit in the space you have.
For a normal replacement, I prefer buying a toilet that works with the existing plumbing rather than creating extra plumbing work just because the new toilet looked better at the store. The bathroom space was likely designed for a toilet of a specific size and a well fitting toilet will look better and feel better than a more aesthetic toilet that does not fit the space.
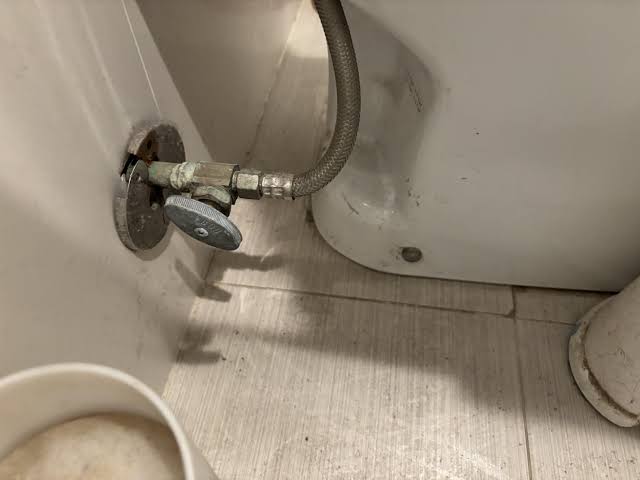
Turn off the water supply valve behind the toilet.
Flush the toilet and hold the handle down to drain as much water as possible from the tank. Use a sponge or towel to remove the remaining water from the tank and bowl. Any left over water will add weight and will probably leak onto you floor when you remove the toilet.
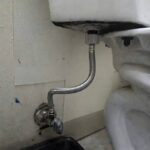
Disconnect the supply line with an adjustable wrench and put a bucket underneath it.
There will be water left in the line. There always is. If you’re working in somebody else’s home you should catch the water, if it is your house do what you want.
Remove the caps covering the mounting bolts at the bottom of the toilet. Loosen the nuts and remove them. When you are lifting the toilet be very careful to not damage, or bend the mounting threads.
If the toilet is caulked around the bottom, cut through the caulk with a utility knife.
Now gently rock the toilet from side to side to break the old seal. Once it is loose, lift it straight up and set it somewhere out of the way. You may need two people for this.
For the love of God do not set the toilet on carpet, the wax seal and the bacteria will stain and ruin your carpet.
I bring card board so I can set the toilet down in the bathroom without making a mess. If you do not have cardboard I would recommend either taking the toilet to the garage or even just putting it in the back yard for now.
Do not reuse the old wax ring. They are single use and you will not get a good seal with a reused wax ring.
Plug the open drain with an old towel while you’re working. This keeps sewer gas from coming into the bathroom and keeps small parts from disappearing down the pipe.
Scrape the old wax away from the flange and clean the area well. It is easier to clean the surface now than it is to rush the process and have to start over when your new toilet leaks.
Now look closely at the flange. Check for:
The flange needs to be solidly attached. If it is broken, badly corroded, or the floor underneath it is damaged, stop here and fix that problem before installing the new toilet.
There is no point installing a brand-new toilet on top of a broken flange.
Install the new toilet bolts into the slots in the flange.
Position them so they line up with the holes in the base of the toilet and will allow the toilet to come straight down over them.
The exact hardware varies between toilets, so don’t assume you can reuse the old hardware.
I still prefer the old school wax rings. As long as you do not move the toilet after it is installed the wax seals work great. Wax-less seals however seem to start leaking at random points in their life.
Some toilets are designed for wax-less seals. If the manufacturer specifies a particular type of seal, use that one. If they don’t have a specific recommendation I would use wax.
Depending on the seal, it may go on the bottom of the toilet or directly on the flange. Follow the instructions for the seal you’re using. My personal preference is to put the seal on the floor flange first. If you stick it to the bottom of the toilet and it falls off during installation it will now be damaged and will need to be replaced.
If the flange is unusually low because of a flooring change, don’t just start stacking wax rings. A different seal or a flange repair may be necessary.
Remove the rag from the drain.
With someone helping you, lift the toilet and carefully lower it over the mounting bolts. Get it lined up before it touches the seal.
Once it is sitting on the seal, press down firmly and evenly to seat the toilet.
Don’t rock the toilet around after it has been set. With a wax seal especially, you don’t get unlimited attempts. If you lift the toilet back up or move it around significantly, I would replace the seal rather than assume it is still going to seal properly.
Getting it right the first time is considerably easier.
Install the washers and nuts on the mounting bolts.
Tighten the nuts gradually, alternating from one side to the other. You want the toilet firmly secured, but you do not want to crush it into submission.
Porcelain can crack if you overtighten the hardware.
If the toilet rocks after the nuts are snug, don’t just keep tightening. A rocking toilet usually means there is a gap between the toilet and the floor. Use a toilet shim to stabilize it.
Once the toilet is secure, cut the excess mounting bolt if necessary and install the decorative caps.
If you have a two-piece toilet, set the tank onto the bowl and install the tank hardware according to the manufacturer’s instructions.
Tighten the bolts evenly until the tank is secure and properly aligned.
Again, don’t go crazy with the wrench. You’re still working with porcelain.
Reconnect the existing supply line if it is in good condition.
If it is old, corroded, kinked, or otherwise questionable, replace it while you have everything apart. You’re already standing there with the water shut off, so this is a good time to deal with it.
Connect the supply line to the fill valve and slowly open the shutoff valve.
Let the tank fill while watching the connection. If you see water, shut the valve back off and fix the connection before continuing.
Don’t put your tools away yet.
Flush the toilet several times and check:
Keep the floor dry while you’re testing. A dry floor makes a small leak much easier to spot.
If water shows up around the base, keep watching to see if the puddle grows. Dry everything thoroughly and figure out where the water is actually coming from.
A small leak may not seem like a big deal now while the toilet is full of clean water, but a small water leak at the seal will leak sewage onto your floor whenever you flush, and perhaps even more importantly, it will allow sewage gasses to leak past the toilet’s built in P-trap that will make your bathroom smell like a Porta-Potty.
Some codes require Caulking while others do not.
I personally always Caulk Toilets.
If you are the home owner, I would highly recommend not Caulking the toilet immediately. Let the toilet sit with normal use for a couple days to see if a leak develops.
If you caulk immediately you could be hiding a small leak that has not had time to show itself yet.
If you are a contractor or handyman, follow your local codes.
A standard toilet replacement is a project I think most reasonably homeowners can handle.
I would stop and call a plumber if:
The toilet itself isn’t particularly complicated. The plumbing underneath it is where things can get expensive.
The biggest thing I would emphasize is inspect the flange before you install the new toilet.
It’s tempting to pull the old toilet out, slap a new wax ring on the new one, and call it a day. If the flange underneath is broken, you’re just putting a new toilet on top of a problem you already know about.
Take a picture of the old setup before disconnecting anything. It can be useful when you’re trying to remember how the supply line or tank hardware was arranged.
Use gloves. Its a toilet for Christ-sake, be sanitary
Have a bucket and more towels than you think you need. Plumbing has a way of finding the one spot you forgot to put a towel.
When you’re setting the toilet, take your time getting it lined up before it touches the seal. Once you’ve compressed a wax ring, you need to make it work or replace the seal again.
And don’t try to stop a rocking toilet by tightening the mounting nuts harder. If the toilet is still moving when the nuts are snug, figure out why. Cracking the porcelain because you were determined to win a wrestling match against a toilet is not a good way to spend a Saturday.
Finally, test everything before you consider the job finished. Flush it several times, watch the supply connection, check around the base, and make sure the toilet is solid on the floor.
My preferred method is to inspect the flange first, use a new manufacturer-approved seal, set the toilet carefully, tighten the mounting hardware evenly, and test the whole installation before I put my tools away. The toilet installation itself isn’t particularly difficult. Making sure the flange, seal, floor, and water connections are right is what keeps a simple toilet replacement from turning into a plumbing repair later.