Physical Address
304 North Cardinal St.
Dorchester Center, MA 02124
Physical Address
304 North Cardinal St.
Dorchester Center, MA 02124

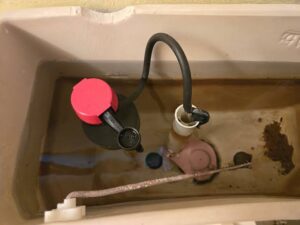
If your toilet takes forever to fill, won’t stop running, or barely lets any water into the tank, there is a good chance the fill valve is the problem.
Replacing a Toilet Fill Valve is about as complicated as toilet repairs get and it still only takes a couple minutes. Just follow along and don’t over complicate it.
If you’re not sure whether the fill valve is the problem, I would start with:
There are several different fill valves available, but most standard gravity-flush toilets can use a universal replacement valve.
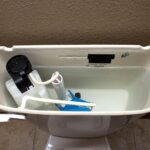
Before buying one, I prefer to take a picture of the inside of the tank. If you’re replacing the valve because it is leaking or not working, you can also bring the old valve with you if you have already removed it.
I can guarantee that you will not remember what your fill valve looks like when you are standing Infront of a wall of various replacements.
You will also want to make sure the replacement valve is adjustable and the threads on the bottom are the right size for the hole in your toilet. Some toilets use unusual fill valves but I only really see those in custom homes.
Before replacing anything, make sure the fill valve is actually causing the problem.
Take the lid off the tank and watch what happens when you flush.
If little or no water enters the tank, first make sure the shutoff valve is open and the supply line isn’t kinked or restricted.
If water is entering the tank but only a weak stream is coming through the fill valve, the valve may be clogged.
You can also have a different problem entirely. If water is entering the tank normally but the tank never reaches its proper level, look to see whether water is leaking through the flapper into the bowl.
If the fill valve is working but the tank is losing water somewhere else, replacing the fill valve isn’t going to solve the problem.
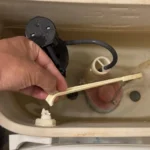
Even if you are certain that the fill valve is the problem I would not jump to replace it immediately. Lots of times in places with hard water the inside of the valve can scale up causing your clog. Play with the float and the lever to exercise the fill valve, this may solve your issue by breaking up the clog.
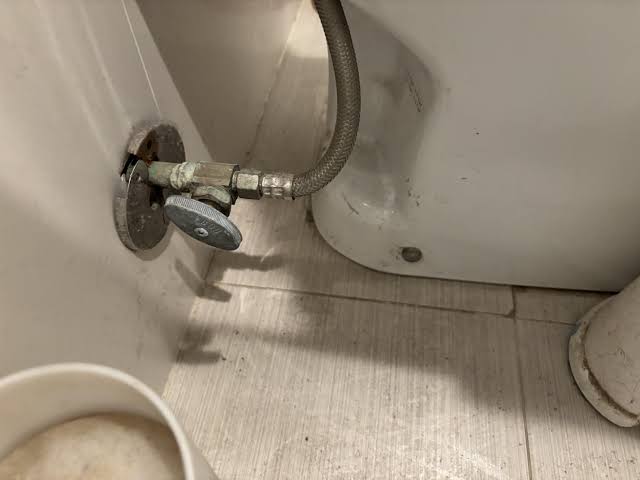
Turn the shutoff valve behind the toilet clockwise to shut off the water.
Then flush the toilet and hold the handle down until most of the water leaves the tank.
You will want to get all of the water out of the tank for this repair. Use a rag or a sponge to clean out the remaining water in the bottom.
If the shutoff valve is stuck, don’t force it.
If you absolutely cannot get the shutoff valve to close, stop here and deal with that problem before disconnecting the supply line or you will have a heaping mess.
→ [How To Replace a Toilet Shutoff Valve]
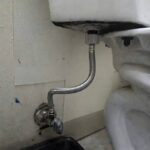
Put your bucket underneath the connection where the water supply line attaches to the bottom of the toilet tank.
Use a pipe wrench or channel locks to loosen the connection.
There will be some water left in the line, so let it drain into the bucket.
Once the line is disconnected, you should be able to see the nut holding the fill valve to the bottom of the tank. It is a plastic nut that goes on the outside of the threads and snugs up to the bottom of the toilet.
Disconnect the small refill tube from the top of the old fill valve.
Then remove the mounting nut underneath the tank.
You may need to hold the fill valve from turning inside the tank while you loosen the nut underneath.
Once the nut is removed, pull the old fill valve straight up and out of the tank.
There will usually be a rubber washer on the inside of the tank and another sealing surface associated with the valve. Pay attention to how the old valve was installed before throwing anything away.
If you forget to replace these seal with the ones from your new kit then your toilet will leak.
Before installing the new valve, compare it with the old one.
If something looks completely different, stop and make sure you actually bought the correct replacement.
Luckily these are pretty universal so if you bought an adjustable one, it will most likely work for your toilet.
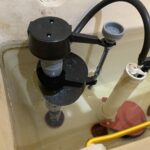
Put the new fill valve into the opening in the bottom of the tank.
Make sure the rubber washer is seated correctly and the valve is positioned where it isn’t going to touch the flapper. Just put the new one how the old one was and you’ll be fine.
From underneath the tank, install the mounting nut.
Tighten it by hand first and then give it a small additional turn with your wrench.
Don’t crank down on it.
The threads and the nut are plastic, you will ruin them if you crank down on it. Also there is a rubber seal inside the tank so all you are doing is compressing that seal a little bit.
If you feel like you are tightening the nut too much and it is still leaking then you most likely forgot the seal that goes inside the tank on the bottom of the fill valve. Remove the valve and double check the seal.
Reattach your water line to the threads on the bottom of the tank.
Attach the refill tube to the new fill valve.
The tube should discharge into the overflow tube.
Use the clip supplied with the valve or the old clip that was installed. If there was not a clip and the new kit did not come with one then you need to go buy one.
This matters because the tank can fill correctly while the bowl doesn’t get enough refill water if the tube isn’t positioned correctly.
Most replacement fill valves are adjustable.
Adjust the valve so the tank fills to the waterline marked on the inside of the tank. If there is not an official mark then there is likely a little scummy water line where the water level used to be. Go to there.
The important thing is that the valve shuts off before the water level reaches the overflow tube otherwise your toilet will never stop running.
If the water level is too low, the toilet may not flush properly.
Slowly open the shutoff valve and let the tank fill.
Watch the connection underneath the tank while the water is running. You want to make sure there isn’t a leak around the new fill valve or supply-line connection.
Let the tank fill completely. Then watch the fill valve shut off. The water should stop an inch or two below the overflow tube.
If the water level is dropping and the fill valve keeps turning back on without you flushing, you may actually have a flapper leak.
→ [How to Replace a Toilet Flapper]
If the toilet is still filling slowly after replacing the valve, go back to the supply. Make sure the shutoff valve is fully open and the supply line isn’t restricted.
If you cannot find an obvious issue then you might want to follow my full diagnostic guide.